
I love miniature gardens and polymer clay – this little project has them both! One thing that makes this garden extra special is the container. When I saw this old metal ladle at a sort of yardsale my grandma was having, I thought, “This would be perfect for a fairy garden!”
And it was.

Isn’t it so cute? 🙂 I filled the ladle with dirt, added some moss, and stuck in the mushrooms and succulents I made from polymer clay.
I took some pictures while I was making the succulents so I could show you guys how to do it yourself. Let’s start with a really easy succulent.
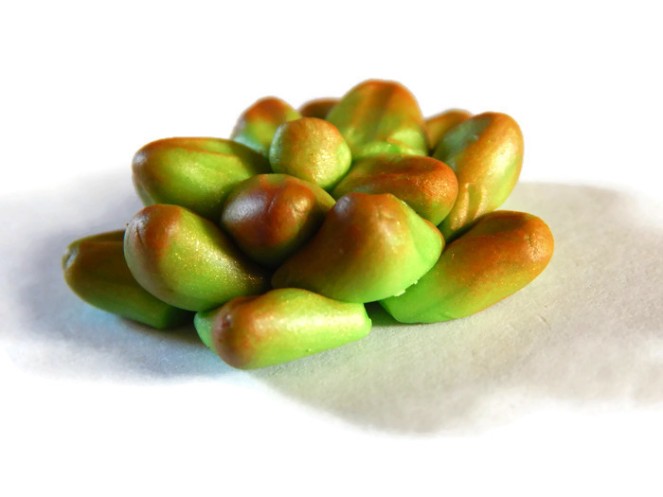
Step 1: Roll lots of little balls from green polymer clay. (More than it shows here.)

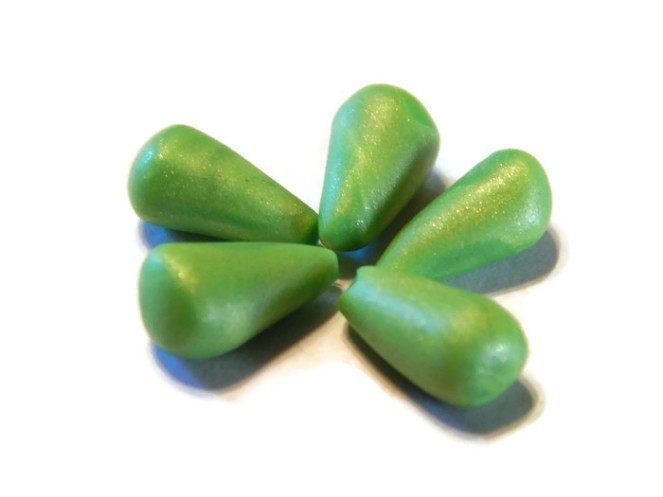
Step 2: Shape the balls into teardrops.
Step 3: Arrange the teardrops as the leaves of the succulent.
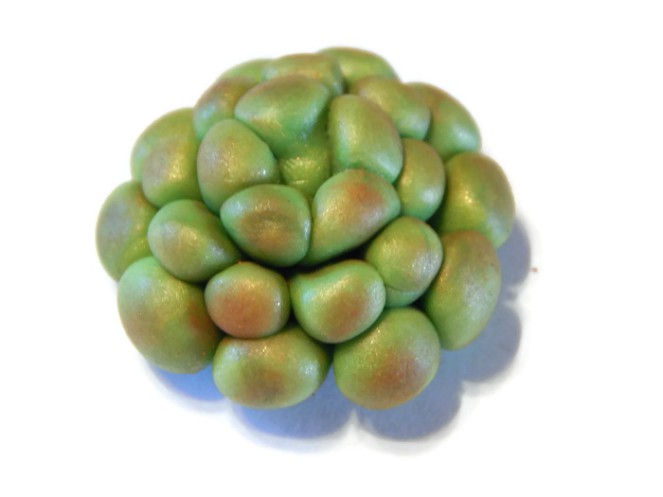
Step 4: Smush together layers of teardrop leaves. Start with small teardrops, then surround them with slightly large teardrops and so on and so forth until the desired shape is formed. Attach the teardrops together pointed side down.
Step 5: If you wish, paint a little red-brown artist’s pastel onto the ends of the leaves.
Now let’s try a harder succulent: (But this is definitely one of my favorites.)
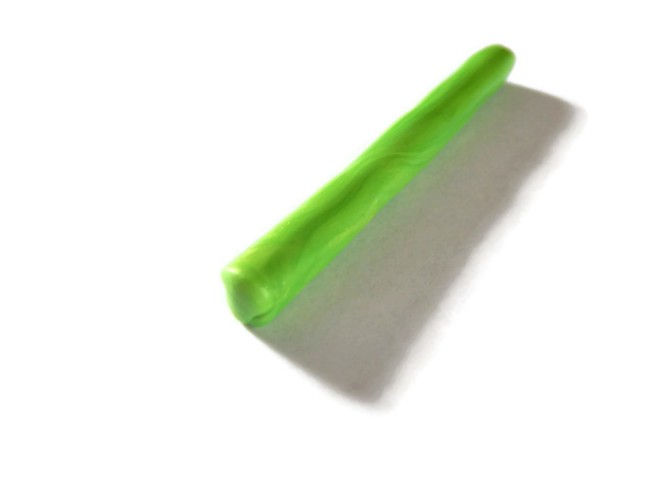
Step 1: Roll a medium sized log of green polymer clay.
Step 2: Cut the log into many small chunks with a knife of some kind (if you don’t have an exacto knife, a kitchen paring knife will work too.)
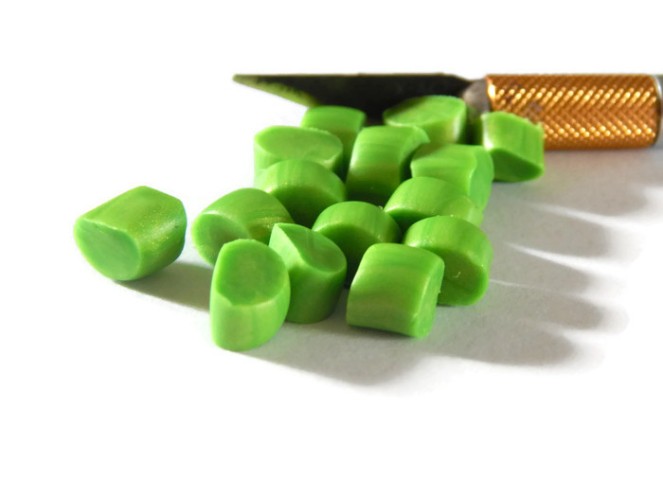
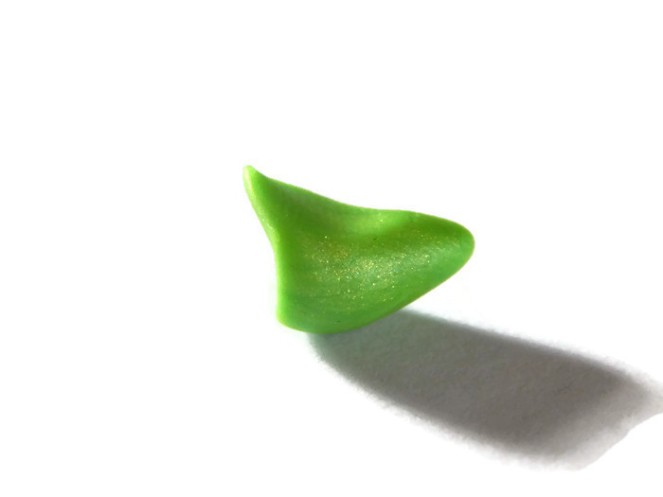
Step 3: Roll one end of each piece to a point so you have a forest of little clay trees.

Step 4: Pinch one of your trees between your thumb and forefinger, like so:Ste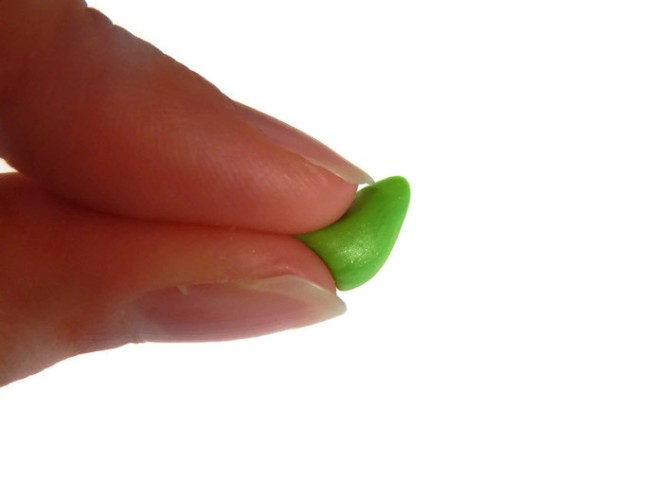
Step 5: Squish five of these deformed tree shapes into a star, like this: Add a tiny cone in the center.
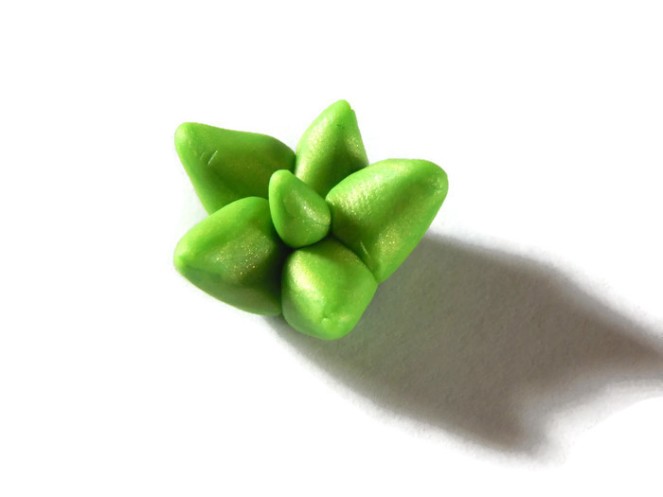
Step 6: Keep adding layers of five around and around until you reach the desired shape. You can also dent the leaves with the end of a paintbrush or a toothpick.

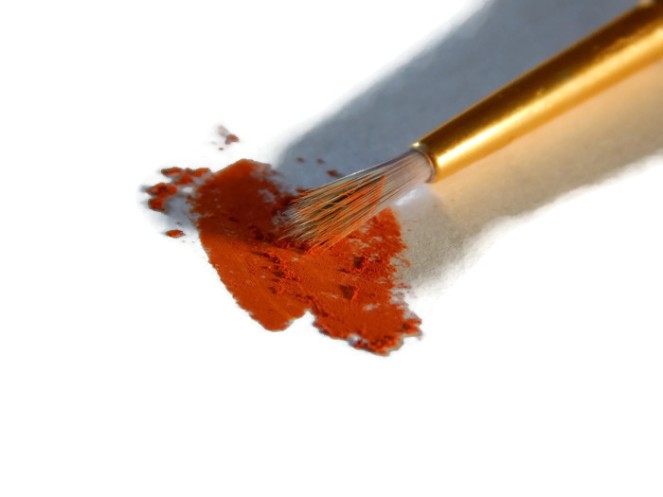
Step 7: Paint the tip of each leaf with red-brown artist’s pastel powder. (Rub some of the chalk onto paper, then brush it on with a small paintbrush.) This makes your succulent a lot more realistic.
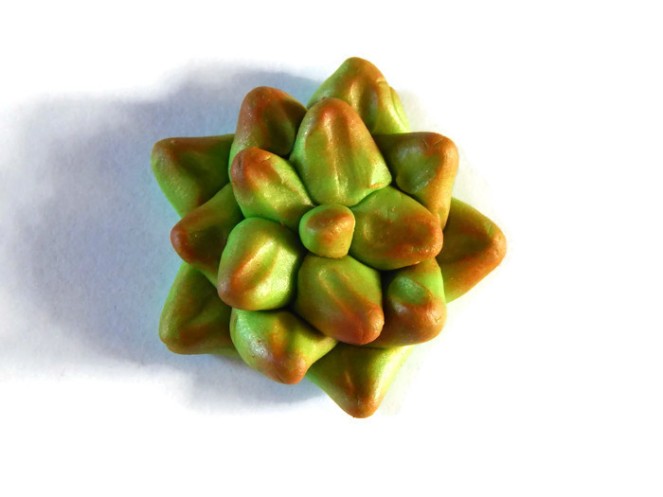
There we go! Know you know how to make two kinds of succulents. Play around with different shaped leaves to make different kinds of succulents.
Do you like making miniature gardens? If so keep watching for another post about them soon!
Thanks for reading, guys! 🙂
***Allison***


Sweet! I think mini succulents are so cute! 🙂 . Now I know what I want to make next time I get out my polymer clay!
~Gracie
LikeLike
Thanks, Grace! Yes, I love them too!
Yay, I hope you get to make them!
LikeLike
This is cool! At first, I thought those were real plants 😀
LikeLike
Thanks! Yay, I love it when that happens. 🙂
LikeLiked by 1 person
Aww, those are adorable! I’ll have to make them and put them in my American Girl Dollhouse! 😀
LikeLike
Thanks so much, Grace! Ooh yeah, that would be great!
LikeLiked by 1 person
You’re welcome! 😀 I’m sure my dolls would love it. 😉
LikeLike
I’m sure they would too. 😉
LikeLiked by 1 person
😀
LikeLike
This is so adorable and amazing! I love your creativity 🙂
LikeLike
Aww, thanks so much, Faith!
LikeLiked by 1 person
The succulents are so cute! Ooh, what’s the next post about? I can’t wait!
LikeLike
Thank you, Lily! Hee hee, I guess you’ll have to wait and see..
LikeLike
You’re welcome!
LikeLike
They look so real! That’s awesome! 🙂
LikeLike
Yay, I’m glad they do! Thank you!
LikeLiked by 1 person
Beautiful and very creative Allison
LikeLike
Thank you so much!
LikeLiked by 1 person
This is the cutest little DIY, Allison! Now I have to get ahold of some polymer clay to make this 😉
LikeLike
Aww, thanks so much, Sarah! I’m glad you liked it!
LikeLiked by 1 person
Those are so cute!
LikeLike
Thank you very much, Mallory! I’m glad you like them!
LikeLiked by 1 person
You’re welcome!
LikeLike
Wow!! I have been wanting to find a way to make a garden that will stay alive for a long time! This is soooo cool!!
Addylover 🙂
LikeLike
Ha ha! Yep, it would be pretty hard to kill this garden. XD Thanks so much, Addylover!
LikeLiked by 1 person
Oooh! It’s SO ADORABLE! Hahaha!!!
LikeLike
Hee hee! Thanks, K. A.!
LikeLiked by 1 person
No prob!
LikeLike
That was hysterical, I saw the picture at the top and seeing the title I assumed that they were real, because they LOOKED real! But then I read that it was all made out of polymer clay, and I was like “What?!” Ha-ha! I LOVE mini-gardens, so I’m looking forward to the next post! 😀
LikeLike
Ha ha! I’m so glad you thought they were real – that’s what I was aiming for. XD Thank you so much, Livy!
LikeLike
This is super cute. 😍
LikeLike
Aww, thanks!
LikeLike
Very creative
LikeLike
Thank you so much!
LikeLiked by 1 person
😉
LikeLike
Aw these are so cute! I would love them for my classroom since we aren’t allowed to have real plants! Thanks!!
Megan
LikeLike
Thank you so much! Oh yes, that WOULD be perfect then! 😀
LikeLike
So cute and great tutorial!!
LikeLike
Thank you so much!
LikeLike
That is super cute! Love it!
LikeLike
Thank you so much!
LikeLike